Mini Chocolate Lava Cakes
Highlighted under: Baking & Desserts
I love treating myself to these Mini Chocolate Lava Cakes because they are the perfect dessert to impress friends and family. Each cake boasts a warm, gooey center that flows like liquid chocolate, creating a delightful surprise when you cut into it. With simple ingredients and a quick baking time, I can whip these up in just 20 minutes. Pairing them with a scoop of vanilla ice cream creates a wonderful contrast in temperature and flavor that I simply can’t resist.
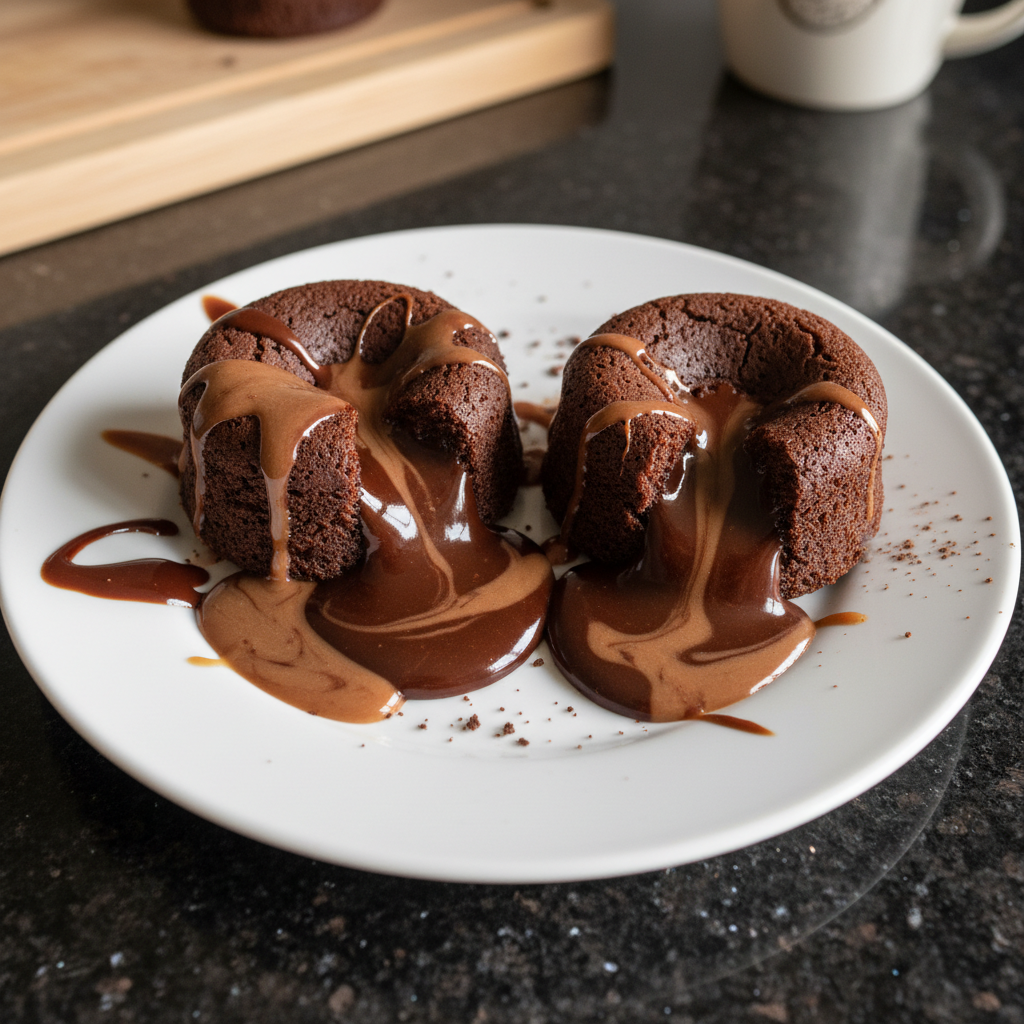
When I first tried making Mini Chocolate Lava Cakes, I was amazed at how easily they came together. The secret lies in using high-quality chocolate and ensuring the cakes are baked just enough so the centers remain molten. It can be a bit intimidating at first, but once I nailed the timing, it became my go-to dessert for dinner parties.
I love serving them warm, with a dusting of powdered sugar on top and a scoop of cold ice cream on the side. The contrast makes each bite an indulgent experience! It’s a dessert that never fails to impress and often leads to requests for the recipe.
Why You'll Love This Recipe
- Rich chocolate flavor paired with fresh orange zest
- Creamy texture that melts in your mouth
- Perfect for celebrations or as a sweet indulgence
Mastering the Chocolate Lava Center
Achieving that perfect lava center is all about timing. When baking, keep a close eye on your cakes as they approach the 10-minute mark. The edges should be set, but the center should still jiggle slightly when you shake the ramekin. This visual cue is critical; even an extra minute can turn a molten center into a firm cake. Remember, the exact baking time may vary slightly depending on your oven's characteristics, so consider testing one cake first if you're unsure.
The combination of eggs in this recipe plays a crucial role in creating that coveted molten center. The egg yolks provide richness while aiding in the structure, ensuring a creamy interior without overbaking. If you're experimenting with substitutions for dietary reasons, you can try using aquafaba or silken tofu as egg replacements, keeping in mind that the texture may slightly change, yet still yield a delicious result.
Serving Suggestions and Pairings
While these mini chocolate lava cakes are a delightful standalone treat, serving them with a scoop of vanilla ice cream elevates the experience. The contrasting temperatures create a beautiful harmony between the hot, gooey cake and the cold ice cream, making each bite a decadent delight. For an extra flair, consider adding a drizzle of raspberry or caramel sauce on the plate for added flavor and an elegant presentation.
For those looking to customize their desserts further, consider adding a teaspoon of fresh orange zest into the batter. This small addition enhances the chocolate flavor and adds a refreshing brightness that balances the richness. You can also experiment by incorporating other fillings, such as a spoonful of peanut butter or Nutella in the center before baking, allowing for a variety of flavor combinations that cater to different tastes.
Ingredients
Gather these ingredients to bring your Mini Chocolate Lava Cakes to life:
Ingredients
- 1/2 cup unsalted butter
- 1 cup semi-sweet chocolate chips
- 2 large eggs
- 2 large egg yolks
- 1/4 cup granulated sugar
- 2 tablespoons all-purpose flour
- 1 teaspoon vanilla extract
- Pinch of salt
Make sure all ingredients are at room temperature for the best results.
Instructions
Follow these steps for perfectly molten Mini Chocolate Lava Cakes:
Preheat the oven and prepare ramekins
Preheat your oven to 425°F (220°C) and grease four ramekins with butter, then coat them with flour. Tap out any excess flour.
Melt the chocolate and butter
In a microwave-safe bowl, combine the butter and chocolate chips. Heat in 30-second intervals, stirring in between, until melted and smooth.
Make the batter
In a separate bowl, whisk together the eggs, egg yolks, and sugar until pale and slightly thick. Stir in the melted chocolate mixture, then add the flour, vanilla extract, and a pinch of salt. Mix until just combined.
Fill the ramekins and bake
Pour the batter evenly into the prepared ramekins, filling each about 3/4 full. Bake for 10-12 minutes, until the edges are firm and the center is still soft.
Serve
Let the cakes cool for 1 minute, then carefully invert each ramekin onto a plate. Serve immediately with ice cream or whipped cream.
Enjoy your delicious Mini Chocolate Lava Cakes while they are warm!
Pro Tips
- Use high-quality chocolate for the best flavor. If unsure about the baking time, check on them after 9 minutes to see if they are set around the edges but still soft in the center.
Make-Ahead and Storage Tips
These mini chocolate lava cakes can be prepared in advance and stored in the refrigerator for up to 24 hours before baking. Just fill the ramekins with batter, cover them tightly with plastic wrap, and refrigerate. When you're ready to bake, remove them from the fridge and let them sit at room temperature for about 15 minutes before baking. This helps ensure even cooking and a delicious molten center.
If you're planning to make them in bulk, consider freezing the unbaked ramekins. Wrap them tightly in plastic wrap and aluminum foil. They can be frozen for up to one month. When you’re ready to enjoy them, bake straight from the freezer, adding a couple of extra minutes to the baking time to ensure they cook through without compromising the gooey interior.
Troubleshooting Common Issues
One common challenge with lava cakes is overbaking, which results in a more cake-like texture rather than the desired molten center. To avoid this, always start checking your cakes at the 10-minute mark. If you notice that the tops appear slightly puffed and glossy while the edges are set, it’s a good indication that they're ready to come out of the oven. Allowing them to cool for just a minute also helps in achieving that perfect flip onto the plate.
If your cakes stick to the ramekins, it may be due to not greasing them adequately. To ensure easy removal, be generous with butter when greasing, and flour the ramekins thoroughly. If you're using non-stick sprays, opt for one that also contains flour for added assurance. In case of minor sticking, run a small knife around the edges before inverting onto a plate; this can help release the cake without breaking it.
Questions About Recipes
→ Can I make these lava cakes in advance?
Yes, you can prepare the batter and refrigerate it for up to 24 hours. Just make sure to take them out and let them come to room temperature before baking.
→ What should I do if my lava cakes don't have molten centers?
It’s usually an issue with baking time. Next time, try reducing the baking time by a minute or two, as every oven varies.
→ Can I substitute the chocolate?
You can use dark or bittersweet chocolate, but avoid using milk chocolate as it may not create the desired molten center.
→ Are there any gluten-free options?
Yes, you can substitute the all-purpose flour with a gluten-free flour blend to make these cakes gluten-free.

Mini Chocolate Lava Cakes
Created by: The Savormile Team
Recipe Type: Baking & Desserts
Skill Level: Easy
Final Quantity: 4 servings
What You'll Need
Ingredients
- 1/2 cup unsalted butter
- 1 cup semi-sweet chocolate chips
- 2 large eggs
- 2 large egg yolks
- 1/4 cup granulated sugar
- 2 tablespoons all-purpose flour
- 1 teaspoon vanilla extract
- Pinch of salt
How-To Steps
Preheat your oven to 425°F (220°C) and grease four ramekins with butter, then coat them with flour. Tap out any excess flour.
In a microwave-safe bowl, combine the butter and chocolate chips. Heat in 30-second intervals, stirring in between, until melted and smooth.
In a separate bowl, whisk together the eggs, egg yolks, and sugar until pale and slightly thick. Stir in the melted chocolate mixture, then add the flour, vanilla extract, and a pinch of salt. Mix until just combined.
Pour the batter evenly into the prepared ramekins, filling each about 3/4 full. Bake for 10-12 minutes, until the edges are firm and the center is still soft.
Let the cakes cool for 1 minute, then carefully invert each ramekin onto a plate. Serve immediately with ice cream or whipped cream.
Extra Tips
- Use high-quality chocolate for the best flavor. If unsure about the baking time, check on them after 9 minutes to see if they are set around the edges but still soft in the center.
Nutritional Breakdown (Per Serving)
- Calories: 380 kcal
- Total Fat: 26g
- Saturated Fat: 15g
- Cholesterol: 195mg
- Sodium: 85mg
- Total Carbohydrates: 32g
- Dietary Fiber: 3g
- Sugars: 24g
- Protein: 6g