Oreo Brownie Bliss Cookies
Highlighted under: Baking & Desserts
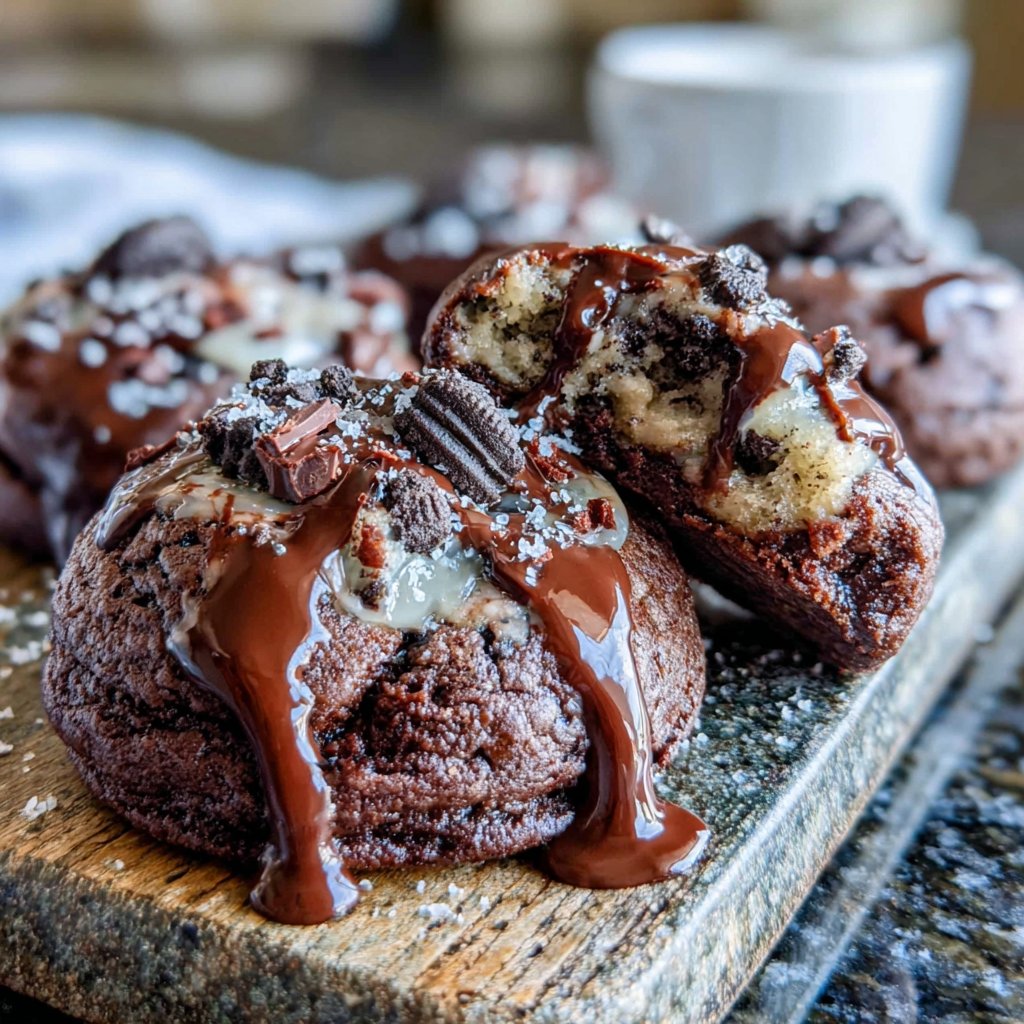
I love baking cookies that combine my favorite flavors, and these Oreo Brownie Bliss Cookies are a perfect example. The rich chocolatey brownie base envelops creamy Oreo pieces, creating a delightful treat that’s impossible to resist. Each bite is soft, chewy, and packed with that iconic cookie crunch. They are perfect for sharing at gatherings or enjoying as a dessert at home. I often make a batch when I crave something sweet and chocolatey, and they never disappoint!
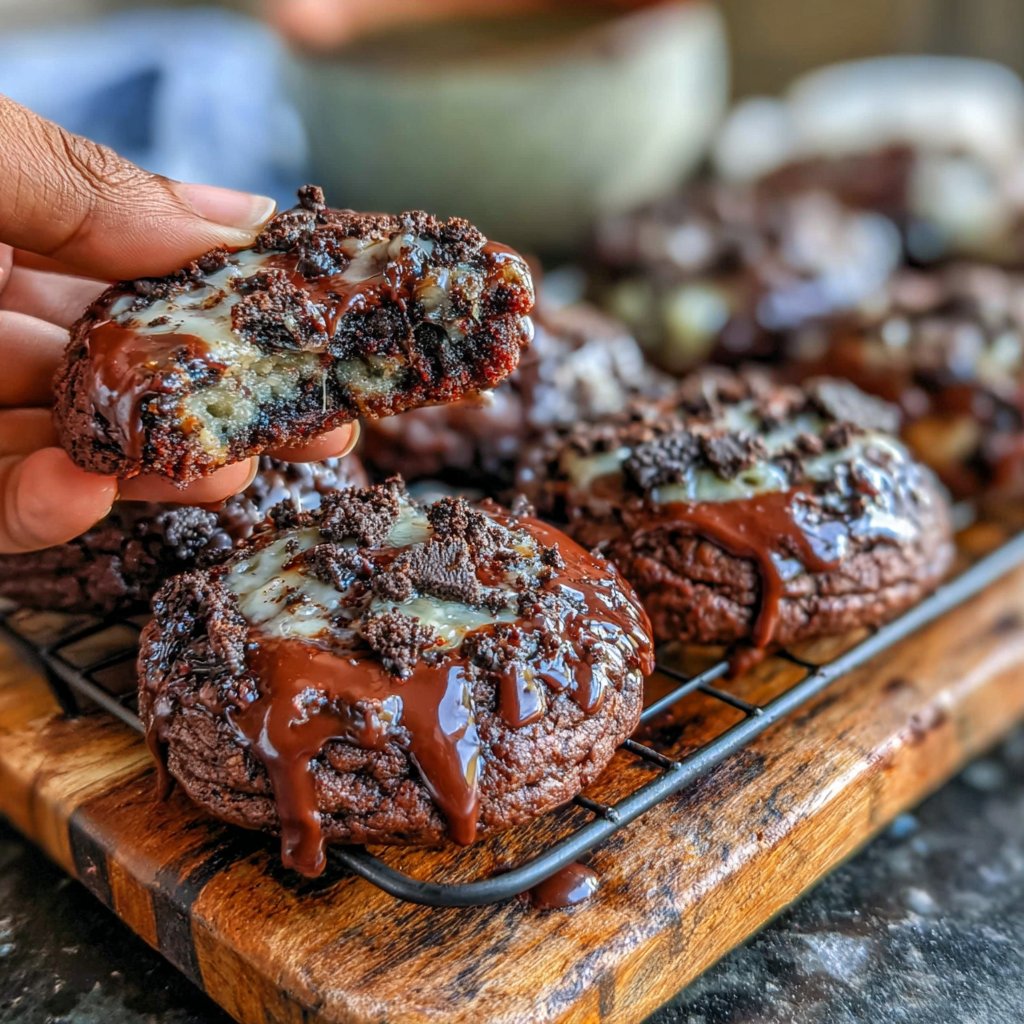
When I first tried combining brownies and Oreos, I didn’t expect such a fantastic flavor explosion. The key is to use a good quality cocoa powder and real butter to create that chewy texture that everyone loves. The creamy Oreos complement the dense brownie, adding an unexpected and delicious crunch that takes these cookies to another level. I recommend not overbaking them to ensure the perfect fudgy interior.
In terms of customization, feel free to mix in different flavors of Oreos or add nuts for an extra crunch. I’ve even experimented with adding a drizzle of melted chocolate on top, which makes them even more indulgent. This recipe is so versatile and allows for creativity that I can’t help but whip it up time and time again!
Why You'll Love These Cookies
- Decadent chocolate flavor meets crunchy Oreo goodness
- Perfectly chewy texture that satisfies every sweet tooth
- Quick and easy recipe, perfect for spontaneous baking
Baking the Perfect Cookie
To achieve the ideal chewy texture in these Oreo Brownie Bliss Cookies, it's crucial to avoid overmixing the dough once you add the dry ingredients. Mixing just until combined ensures that the cookie remains soft and doesn’t develop a dense, cake-like structure. The addition of crushed Oreos should be done gently, preserving some of the crunchy cookie pieces that add delightful texture and flavor in each bite.
When shaping the cookies, use a cookie scoop or tablespoon to ensure uniform size. This not only helps with even baking, but it also promotes consistent texture across the batch. Space the cookies at least 2 inches apart on the baking sheet to allow for spreading. As they bake, look for the edges to set and the tops to form small cracks, signaling that they are ready to come out of the oven.
Ingredient Insights
Unsweetened cocoa powder is the star of the brownie base, providing a deep, rich chocolate flavor that perfectly complements the sweetness of the Oreos. For a more intense chocolate experience, consider using Dutch-processed cocoa, which will give a milder flavor and darker color. This small swap can elevate your cookie game significantly, ensuring each bite is a chocolate lover's dream.
Using room temperature eggs helps emulsify the ingredients more effectively, which is vital for achieving a smooth batter that incorporates air and rises properly. If you forget to set your eggs out, a quick dunk in warm water for about 10 minutes can remedy the situation. This technique allows the eggs to blend seamlessly into the wet ingredients, contributing to the overall texture of the cookies.
Ingredients
Ingredients
For the Cookies
- 1 cup unsalted butter, melted
- 2 cups granulated sugar
- 4 large eggs
- 1 teaspoon vanilla extract
- 1 cup all-purpose flour
- ⅔ cup unsweetened cocoa powder
- ½ teaspoon baking powder
- ½ teaspoon salt
- 1 cup crushed Oreo cookies
Instructions
Instructions
Preheat the Oven
Preheat your oven to 350°F (175°C). Line a baking sheet with parchment paper.
Mix Wet Ingredients
In a large bowl, whisk together the melted butter and sugar until well combined. Add the eggs, one at a time, mixing well after each addition, followed by the vanilla extract.
Combine Dry Ingredients
In a separate bowl, sift together the flour, cocoa powder, baking powder, and salt. Gradually add the dry mixture to the wet ingredients, stirring until just combined.
Add Oreos
Fold in the crushed Oreo cookies, ensuring they are evenly distributed throughout the dough.
Shape and Bake
Drop tablespoon-sized portions of dough onto the prepared baking sheet, spacing them about 2 inches apart. Bake for 20-25 minutes, or until the edges are set.
Cool and Serve
Allow the cookies to cool on the baking sheet for a few minutes before transferring them to a wire rack to cool completely.
Pro Tips
- For best results, allow the cookies to cool completely before storing in an airtight container. They also freeze well, so feel free to make a double batch and save some for later!
Make-Ahead and Storage
These Oreo Brownie Bliss Cookies can be made ahead of time, making them a great option for busy weeks. Once baked, allow the cookies to cool completely, then store them in an airtight container at room temperature for up to five days. If you want to extend their freshness, you can refrigerate them, where they’ll last for about a week. Just be sure to let them come back to room temperature before enjoying to restore their chewy texture.
For an even more indulgent treat, consider freezing the cookie dough. After shaping the dough into balls, place them on a baking sheet and freeze until solid before transferring them to a freezer bag. They can be stored for up to three months. When you're ready to bake, there’s no need to thaw—simply add a couple of extra minutes to the baking time.
Variations and Serving Suggestions
Feel free to add your own twist to these cookies by incorporating additional mix-ins such as chocolate chips, nuts, or even a drizzle of caramel. If you're a fan of mint, consider adding a few drops of peppermint extract to the batter for a refreshing flavor that pairs beautifully with the chocolate and Oreo. Experimenting with different variations can lead to exciting new favorites each time you bake.
Serving these cookies warm with a scoop of vanilla ice cream or a drizzle of chocolate sauce can elevate your dessert experience. For special occasions, transform them into a sundae by layering crumbled cookies with ice cream and toppings in a glass dish. This not only looks impressive but also allows you to enjoy the rich flavors of the brownies and Oreos in a new way.
Questions About Recipes
→ Can I use different types of cookies?
Absolutely! You can experiment with various flavored Oreos or even other types of sandwich cookies for a unique twist.
→ How do I store these cookies?
Store the cookies in an airtight container at room temperature for up to 5 days or freeze them for longer storage.
→ Can I make these ahead of time?
Yes, you can prepare the cookie dough ahead of time and refrigerate it for up to 2 days before baking.
→ What can I replace the butter with?
You can use coconut oil or a plant-based butter for a dairy-free version, but keep in mind the flavor may change slightly.
Oreo Brownie Bliss Cookies
Created by: The Savormile Team
Recipe Type: Baking & Desserts
Skill Level: Easy
Final Quantity: 12 cookies
What You'll Need
For the Cookies
- 1 cup unsalted butter, melted
- 2 cups granulated sugar
- 4 large eggs
- 1 teaspoon vanilla extract
- 1 cup all-purpose flour
- ⅔ cup unsweetened cocoa powder
- ½ teaspoon baking powder
- ½ teaspoon salt
- 1 cup crushed Oreo cookies
How-To Steps
Preheat your oven to 350°F (175°C). Line a baking sheet with parchment paper.
In a large bowl, whisk together the melted butter and sugar until well combined. Add the eggs, one at a time, mixing well after each addition, followed by the vanilla extract.
In a separate bowl, sift together the flour, cocoa powder, baking powder, and salt. Gradually add the dry mixture to the wet ingredients, stirring until just combined.
Fold in the crushed Oreo cookies, ensuring they are evenly distributed throughout the dough.
Drop tablespoon-sized portions of dough onto the prepared baking sheet, spacing them about 2 inches apart. Bake for 20-25 minutes, or until the edges are set.
Allow the cookies to cool on the baking sheet for a few minutes before transferring them to a wire rack to cool completely.
Extra Tips
- For best results, allow the cookies to cool completely before storing in an airtight container. They also freeze well, so feel free to make a double batch and save some for later!
Nutritional Breakdown (Per Serving)
- Calories: 220 kcal
- Total Fat: 10g
- Saturated Fat: 6g
- Cholesterol: 50mg
- Sodium: 150mg
- Total Carbohydrates: 30g
- Dietary Fiber: 1g
- Sugars: 20g
- Protein: 3g